
Google Analytics 4 brings advanced measurement to your website. It’s an excellent tool for marketers. However, you have first to set it up correctly. But don’t worry. This article has your back and will walk you through everything you need to know about it, including how to set up GA4.
What is Google Analytics 4?

Better known as GA4, Google Analytics 4 is a new measure for the future. It was launched by Google last October 2020, and it has helped numerous websites fully understand their consumers.
It collects website and app data, allowing you to analyze your customer journey using events instead of session-based data. GA4 also has a privacy-centric design which improves ROI, especially for long-term marketing initiatives.
Aside from that, it also has the following features:
- Includes cookieless measurement, behavioral, and conversion modeling
- Has predictive abilities that guide you without dealing with complex models
- Offers direct media integrations to drive website or app behaviors
Google Analytics 4 replaces Universal Analytics as the next-generation measuring solution. This is especially since, starting July 1, 2023, Universal Analytics will stop processing new hits.
So, if you haven’t yet, it’s highly recommended to mitigate or start using Google Analytics 4 moving forward.
Starting your journey with it is quite easy. Here’s how you can set up GA4.
How to Set Up GA4: Creating your Google Analytics 4 Account
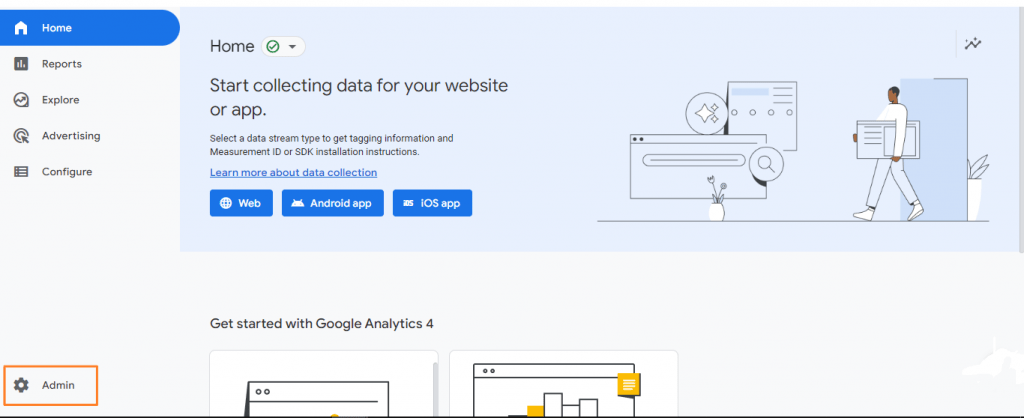
Step 1: Get Started with Google Analytics

Source: Google Analytics
To use GA4, you’ll need to have a Google Analytics account. The first thing that you have to do then is to sign onto it. To do this, click Sign in to Analytics.
If you don’t have an account, you can set it up by selecting Get Started today.
Click on the Admin button on your dashboard’s bottom left corner once you’ve accessed your account.
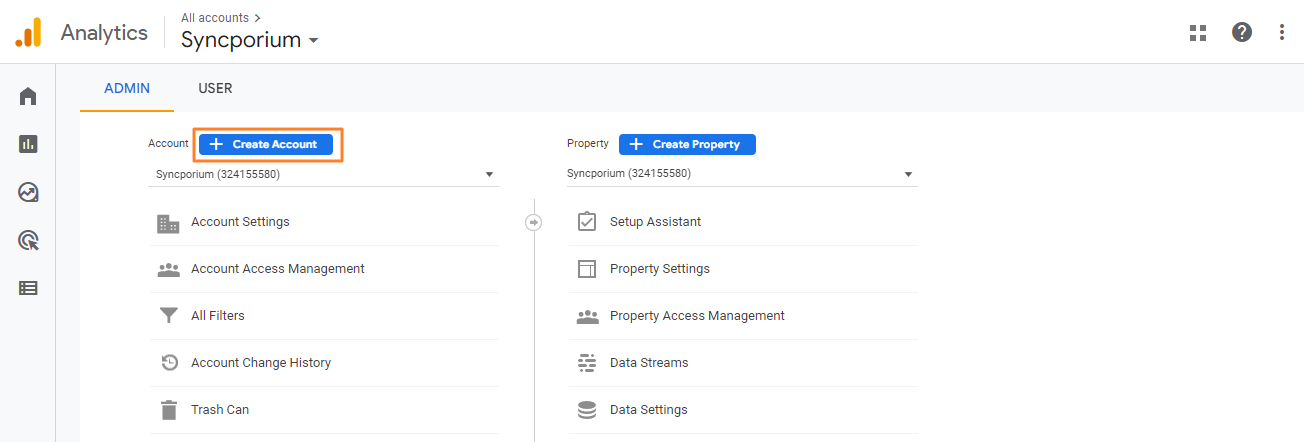
Step 2: Set up your Account

Source: Google Analytics
Then, select Create an Account and type in the name of the account you’ll be using. This is usually the name of the company or business you will be measuring.
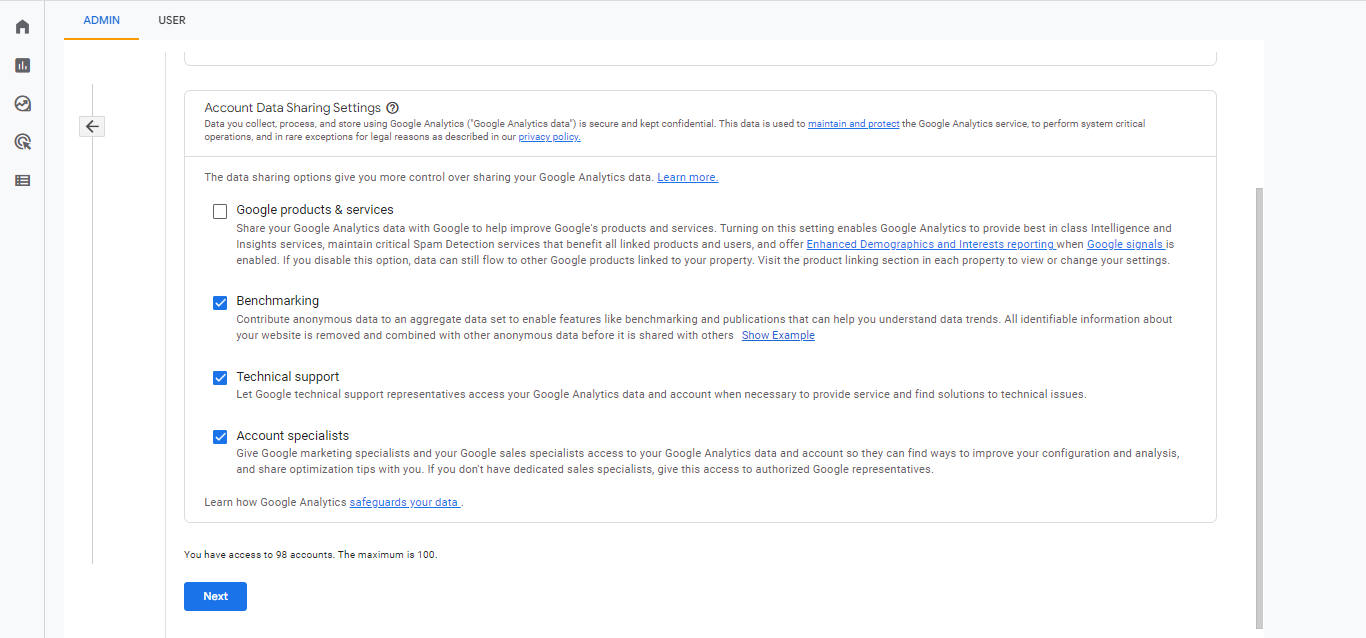
Source: Google Analytics
From there, you will also be asked to configure the data-sharing settings of the account. This allows you to choose what information you want to share with Google.
Step 3: Create Property
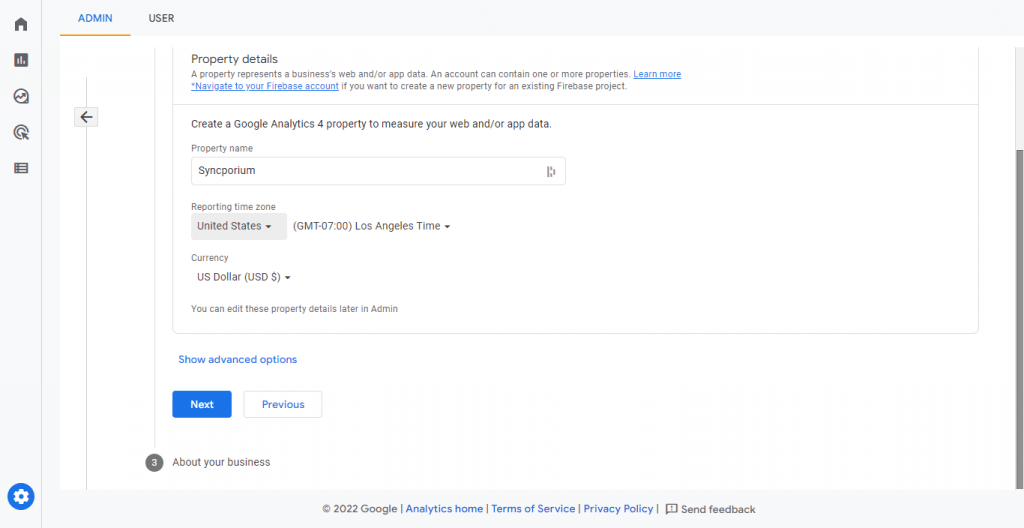
Source: Google Analytics
So, after setting up your account, the next step in the GA4 Setup Process is to create a property. Then, provide a name for this property, and ensure that you select the correct time zone for your reports and the current.
If you need to change anything later, you can always edit the details in Admin, as stated in the image above.
Step 4: Provide Business Information
Then, please answer the questions below about your business to tailor it to your needs properly. You’ll be asked to select the Industry you belong to and the size of your business.
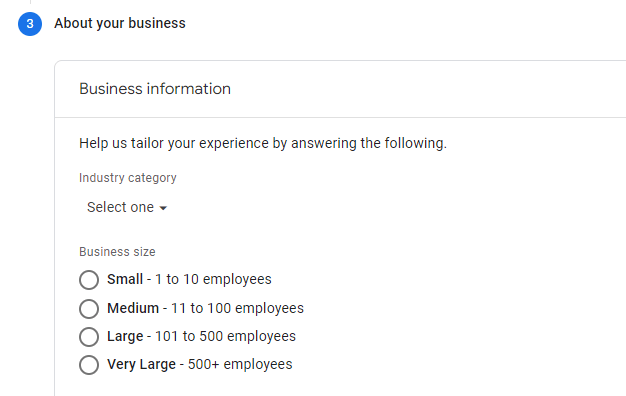
Source: Google Analytics
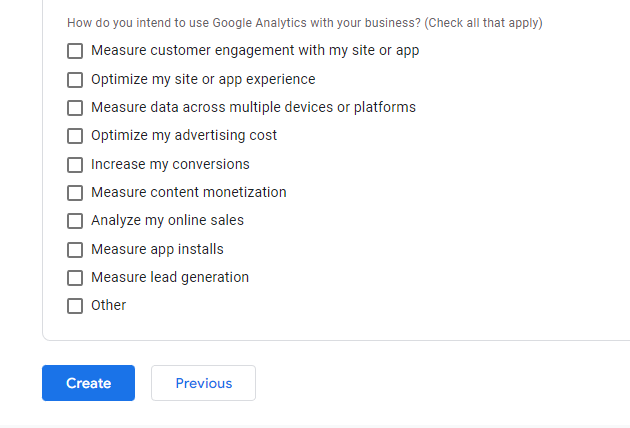
Afterward, check all the reasons that apply to how you intend to use Google Analytics.
Step 5: Check and Accept Relevant Terms of Service Agreement
First, check the boxes to agree to the GDPR-required Data Processing Terms and the Measurement Controller–Controller Data Protection Terms.
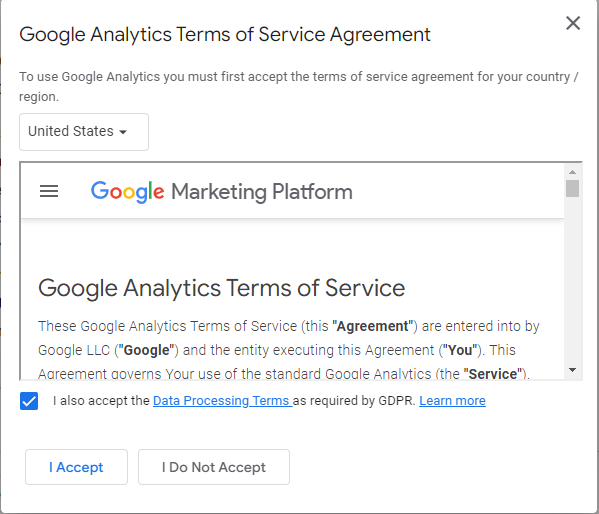
Then, click “I Accept,” and that’s it! You’ve successfully created your property and account.
How to Set Up GA4: Adding a Data Stream
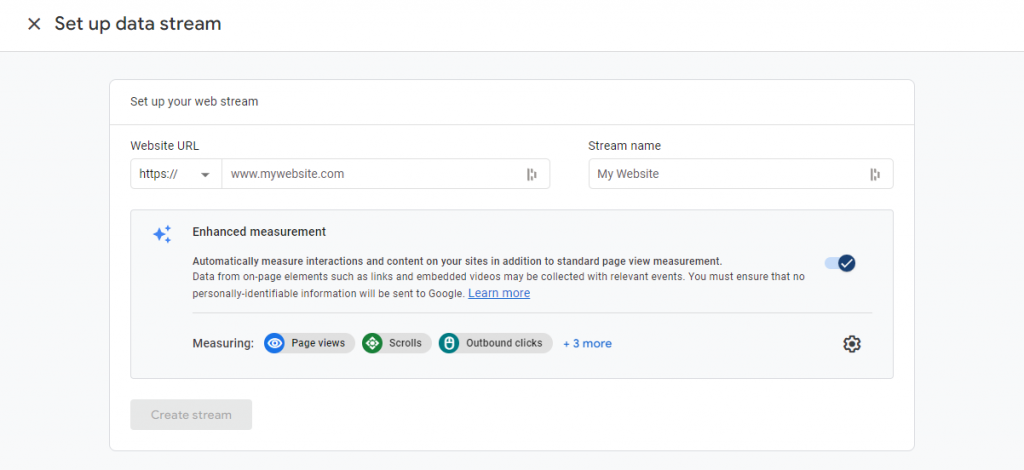
The next thing to do after setting up your account and properties is to add a Data Stream. To do this, choose the platform you want to collect data from.

Source: Google Analytics
Platform: Web
Source: Google Analytics
- Enter your primary website’s URL.
- You can also choose to turn on or off the enhanced measurement. Page views and other events are automatically tracked by enhanced measurement. After you’ve set up the data stream, you can always go back and turn off the enhanced measurement events you don’t want to collect. We highly recommend turning this measurement on.
- Third, Create the Stream.
Platform: Android/IOS App
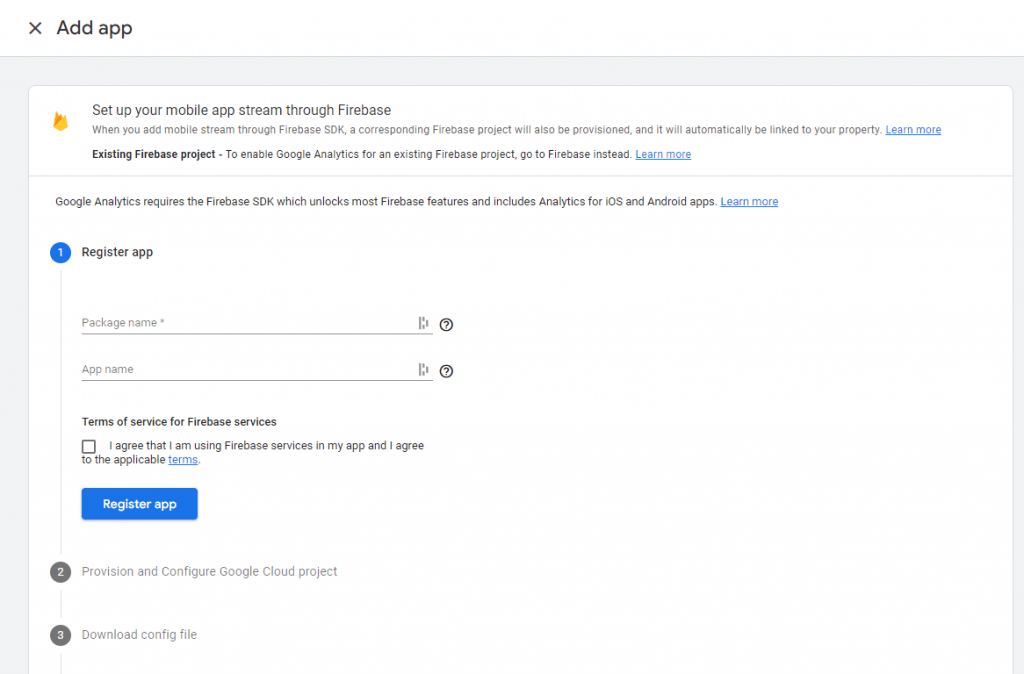
Source: Google Analytics
- Click Register app after entering the iOS bundle ID or Android package name, app name, and iOS App Store ID.
- Next, download your app’s config file.
- Then, install the Google Analytics for Firebase SDK to your project.
- Continue.
- Lastly, run your app to confirm SDK installation and Google server communication.
And you’re done! You can also click Skip this step to finish the app setup later.
Setting Up Data Collection for Websites
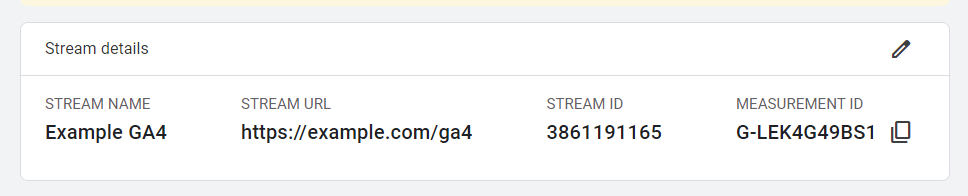
After creating your Google Analytics account, what you need to do next to add it to your web page is this. Follow the steps below to find your “G-” ID, and then paste it into the Google Analytics field that your CMS gives you.
- Click the Admin button.
- Check that your new Google Analytics 4 property is selected in the Property column, then click Data Streams >> Web. Click on the stream of data.
- Your “G-” ID is in the upper right corner. Enter your “G-” ID in the space provided by your CMS:
Source: Google Analytics
Then, to integrate them with relevant sites such as WordPress, WooCommerce, or Wix, you can follow the following instructions by clicking the links below.
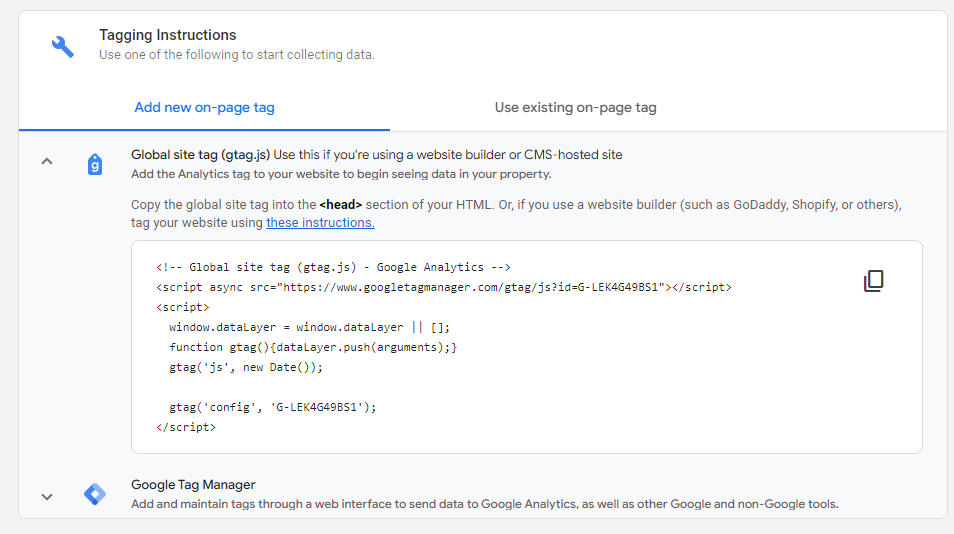
Data Collection for All Other Website Builders: Global Site Tags
Meanwhile, if you are using others website builders than the ones stated above, you would need to copy and paste your entire global tag into your website using CMS’s custom HTML feature.
To do this, follow the steps below.
- Click Admin
- Next, go to Properties >> Data Streams >> Web
- Under tagging sections, click Add new on-page tag >> Global Site tag. After doing so, the Global site tag will then appear below.
Source: Google Analytics
Next, copy the entire (gtags.js) to the header section of your HTML, or follow the website builder’s instructions to tag it to your site successfully.
Follow those, and that’s it. You can now track and measure the key metrics of your website using a more advanced measuring system.
Final Thoughts
All in all, Google Analytics is one of the most essential and beneficial tools you can use for your business. It’s one of the tools for web analytics that offers different benefits, including tracking your online traffic, helping you understand your customers, and more.
Not only that, but constantly being updated with Google Analytics and their current updates also optimize your website. And with the advancements of GA4, you can do this in a way that is easier and more convenient.
So, now that you’ve learned how to set up GA4, you can easily install it whenever you want. Use GA4 now, and give the best measurement to your website.